How to make collages using PhotoMix templates
Your own collage in 3 steps! Currently there are more than 500 ready to use templates at our site and you'll need just few seconds to make collage with your photos. Let's have a look at 3 steps below and learn all secrets of a perfect collage!
Step 1. Preparing to make a collage
- Browse through PhotoMix’s template collection.
- When you find a template that you like, click on the “Download” button found below the screenshot. Your download should start automatically.
- After the download is complete, launch the PhotoMix software
- To open the template that you have saved on your hard disk drive, click on “File” on the menu toolbar and then click on “Open”. You may also use the keyboard shortcut Ctrl+O.
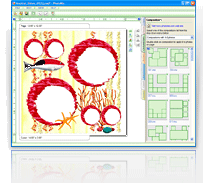
This tutorial uses a template from the Sunny Side Up add-in as an example
Step 2. Adding your photos
- At the right portion of the window, you will find several tabs. Click on the “Photos” tab and then click on “Add photos”.
- You may now select photos from your own collection and add them to the Photos tab. You may also launch Windows Explorer to select photos and simply drag them to the Photos tab.
- When you have chosen a photo that you would like to use, simply drag and release it to your desired frame.
- To position your photo perfectly, simply use the buttons surrounding the frame. By using the palm button, you can drag photos towards any direction to make sure that they are positioned exactly where you want them to be.
- Follow the same steps for the rest of the frames on your chosen template.
Step 3. Saving your work
- Once you are satisfied with your work, you are ready to save your collage. To do this, click on the “Main” tab located at the right side of the window.
- Click on “Save as photo”.
- Select your preferred format.
- Click on “Save”.
Enjoy your collage
- After you have saved your collage project, you can choose to print it or even email it to your friends and family!


