How to easily make new collages using old projects
Step 1. Opening existing projects
The first thing you need to do is choose among your existing projects and open the one you would like to work with. To do this, you can choose from the following methods:
- Click on File located on the menu toolbar and then click on Open project.
- Use the keyboard shortcut Ctrl+O
- Click on Open project at the Start menu located at the right side of the window.
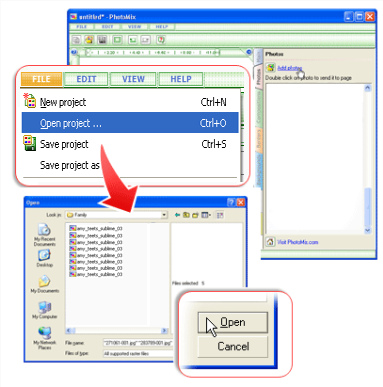
After performing any one of these methods, a dialog box will appear. In that box, select the folder where your chosen project is saved. Then, choose the file name from the list that appears. After doing so, click on the Open button. Another way to do this is to simply locate your project wherever it is stored and then drag and drop its icon to the open PhotoMix program.
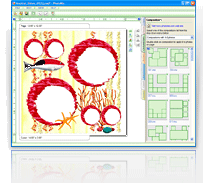
This tutorial uses the Amy Teets' Sublime #3 template as an example.Step 2. Selecting new photos.
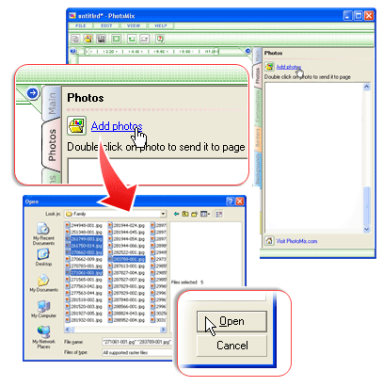
The next thing you should do is select the new photos that you would like to use for this new collage project. To do this, you can choose from the following methods:
- Click on File located on the menu toolbar and then click on Add photos to list
- Use the keyboard shortcut Ctrl+I
- Click on the Photos tab located at the right side of the window and then click on Add photos.
After performing any one of these methods, a dialog box will appear. In that box, select the folder where your photos are saved. Then, choose the file names from the list. After doing so, click on the Open button.
Step 3. Replacing old photos.
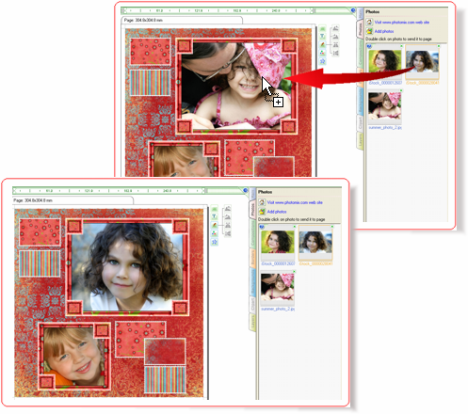
- Select a photo in the Photos list located at the right side of the window.
- Drag and drop the photo to your desired frame.
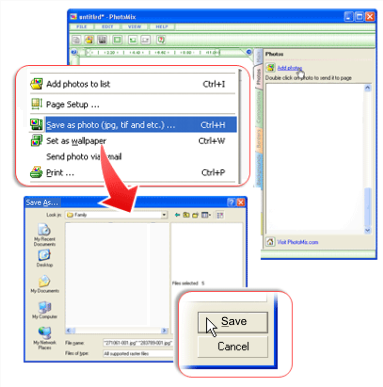
Step 4. Saving your new collage.
Once all the photos have been replaced with new ones, you are ready to save your collage! To do this, you can choose from the following methods:
- Click on File located on the menu toolbar and then click Save as Photo (jpg, tif and etc).
- Use the keyboard shortcut Ctrl+H .
- Click on the Main tab located at the right side of the window and then click on Save as photo.
This function is disabled in the PhotoMix trial version. Purchase the full-featured software to benefit from this and many other features!